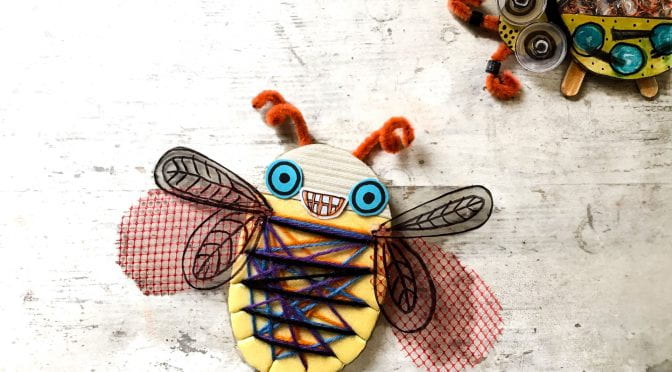
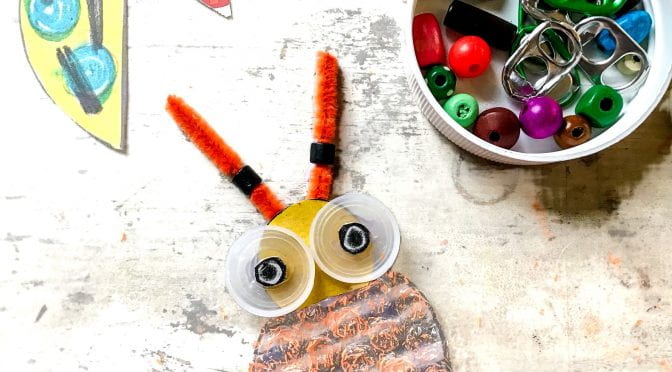
I love Gallery Day. Student work has been loaded on the Student Gallery Page; to see the mind-blowing creations visit the Student Gallery page. Here is just a sampling of the outstanding work from the past week:
I will add all to the work to the Student Gallery page by 3 pm today. If your child has work they would like to submit, please know I will accept work at any time, there is no deadline. The only reason I post at 3 on Fridays is to have as much work as possible revealed at once. I will however, add student work anytime after.
Please see the “Submitting Student Work” Page for more information.
Un grand merci to all those taking part. I love your work so much!
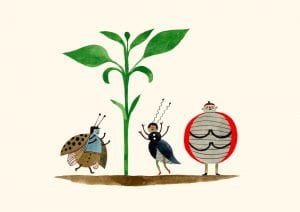
Today we are going to craft and insect or a bug from recycled materials. It might be a good idea to listen to “Du Iz Tak” again and observe the bugs: their shapes, their colours and markings.
An image of insects by author and illustrator Carson Ellis
I received some wonderful photos of bug forts from students yesterday – your creativity is outstanding! I smiled all day long yesterday because of what you created.
It’s time to raid your recycling bin again!
You will need a sturdier base for the body – the cardboard from cereal boxes or the bottom of a clean foam tray. Both are easy to cut with scissors too. The rest of the materials listed below are completely optional. Feel free to use what you can find around the house.
Recyclables and a few craft supplies thrown in!
Materials:
cereal, cracker or granola bar boxes OR
styrofoam trays
string, yarn, ribbon
plastic bottle lids, metal pull tabs and other small recycled bits
clear plastic from produce or packaging boxes (optional)
beads (optional)
pipe cleaners (optional)
scissors
pencil or marker
glue or tape
crayons, markers or pencil crayons
plain recycled paper and/or patterned paper
Remember: I’m only here to inspire you with a project. Feel free to use any recycled materials you would like to for the activity. One of the greatest things about the practice of making is the problem solving involved. If you don’t have one material you need for a step, what do you have on hand to use in it’s place?
Step-By-Step Instructions
I made two eBooks with the step-by-step instructions on how to make two different style bugs:
Tomorrow is Gallery Day! I am so excited to share with you all the submissions I’ve already received. If you would like to share your work with others, please see the ” Submitting Student Work” tab at the top of the home page. I will accept your work at any time. I hope to post as much work as possible by noon tomorrow, but if you are late with your submission, send it to me anyway at dzibin@sd79.bc.ca.
Today is the day we make our forts! It’s raining today — so fort making indoors, while listening to an audio book maybe, sounds lovely.
First, you will need to sketch a design for your fort:
All good builds start with a design idea.
If you are having trouble coming up with ideas, simply google “Toy tree forts” or “Fairy tree forts” under images and a ton of ideas will turn up to inspire you!
Now if all you wanted to do was draw a fort and stop there, that’s wonderful!
If you would like to continue, go to your recycling box and see what supplies you have in there to help build the base of your fort:
Mme Zibin’s recyclables
If you wanted to make your fort only from the supplies you collected in the forest, that’s fine too!
Mme Zibin’s forest supplies.
If you would like to mix your forest supplies with your recyclables, you have two options:
Just like blocks, you can build and balance all your forest supplies to build a fort, with out using any glue or tape. In fact, a wonderful challenge would be to build a fort using no adhesives at all. Use only string and balancing.
Or you could use the following materials to put your fort together:
Materials to put your fort together.
Pictured are the many different ways you could attach items together. You could also use wire or twist ties or with a parent use hammer and nails — the list is endless! It’s up to you and your family.
A tip for starting your build with recyclables:
I love paper towel and toilet paper rolls. I also adore cardboard. Using a special paper technique, you can build a sturdy base for your fort:
How to cut a flange
and then using glue or tape, attach your flange to your cardboard base:
Flange and base.
Now add all your materials together!
I decided to make fort platforms by hot gluing twigs to a cardboard base:
Fort platform.
I can’t wait to work on my fort today! I will share my fort with you all on Gallery Day this Friday.
Remember, you can use ANY materials you want to build a fort:
Other ways of making forts.
Being creative and making is the only goal!
I made an ebook for you all to read on fort making. Find it here:
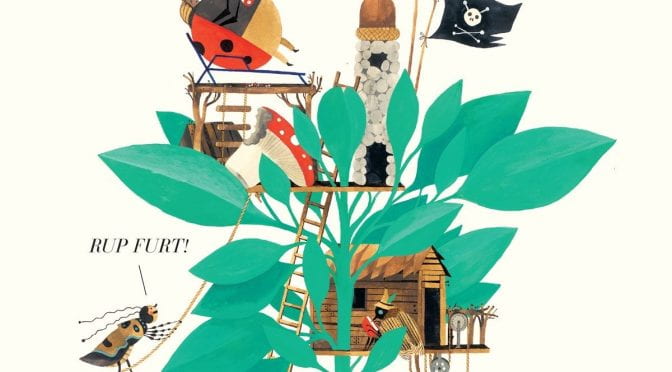
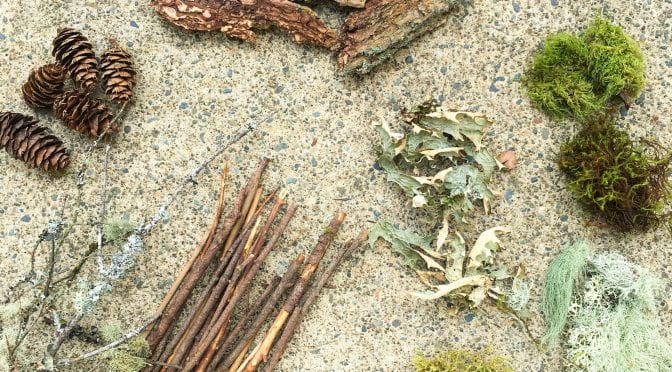
Today, let’s #getoutside and take a walk in the forest! Besides going for a walk, we are also going to hunt for insect fort supplies.
The insect fort built by friends in “Du Iz Tak” by Carson Elliis.
I’ve written an ebook for you to read together as a family, both in English and in French! The book will let you know what you need and what to hunt for on your walk. I would like to thank our wonderful EA, Mme Nathalie, for helping with the French translation.
One fabulous feature of Book Creator is that you can have a book read to you in any language. To have the French read to your child, follow the steps in the short video below:
Once you are home, organize your supplies into categories:
“Rup Furt” supplies gathered in the forest.
and start sketching out some fort ideas!
Think/Empathy/Question: What do insects need in a fort?
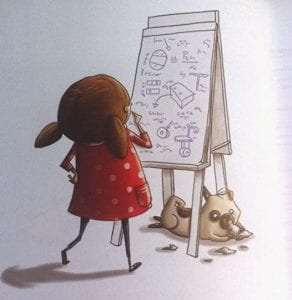
Design sketches help guide your ideas:
All great designs start with a plan! From “The Most Magnificent Thing” by Ashley Spires.
Iggy drew a bridge plan to help save his class in “Iggy Peck Architect” by Andrea Beaty.
Tomorrow we will gather recyclables from our recycling box and together with our forest finds, build something fun!
*Please note: All my ideas are merely suggestions. If a student would prefer building a fort from Lego, or from blankets and pillows, or Keva planks, or blocks, or just draw a fort on paper, it’s all wonderful and just as important.
If you would like to send me a picture of your forest finds and/or your design sketches, please do! Please see the “Student Submissions” tab a the top of the main page for more information.
Today is Gallery Day – when we show off all the amazing work you did this past week! I have created a Student Gallery Page on the home page of the blog. You can find the tab for the page at the top right:
Student work will live there and I will add to the page every Friday, with new work posted in the afternoon.
Please see the Submitting Student Work page if you would like to submit your child’s or family’s work. You can find the tab on the home page.
I really enjoyed my week and I loved the work I have received so far. Your flowers made me smile. It was one of the happiest parts of my week. Merci!
One of the reasons I became a teacher is because I truly love learning. As a teacher, my goal is to instill a love of lifelong learning in my students.
Today I taught myself basic stop motion animation. I’m sure a ton of my students are able to create more sophisticated videos than what I made today, but I’m still super proud of my work!
Why?
I wanted to create a little introduction to start off my videos for when I read stories aloud online. Over the years I’ve amassed a large collection of vintage school supplies, saving them for who knows what — a pandemic, I guess? I chose to use my 100 year old anagram letters and a vintage chalkboard as manipulatives for my introduction video. Since I’m working from home, I have more time to explore techniques and tech and so I decided to create a stop motion video with my vintage supplies.
I didn’t have a Q so I had to paint in a little yellow tail on an O.
Platform
I chose to use the Stop Motion Studio app our school district recommends:
I found the app incredibly straightforward and easy to use. I made the video entirely on my iPad, taking only 30 minutes to complete.
In Stop Motion Studio, pictures are taken one by one to make the video.
Music
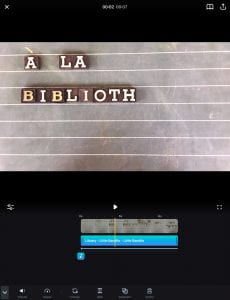
When you create a stop motion video in the Stop Motion Studio app, it is soundless. You can add an audio voiceover, but I chose to save the app to my camera roll. Next, I downloaded the song, “Library” by The Little Bandits from iTunes (there may be a TikToc video coming soon using that song…) and added a sound clip to my stop motion video in the Splice app. I could have used iMovie but I find it’s glitchy and doesn’t work well for me. I prefer to use Splice and find it easy to use.
Editing the stop motion video in the Splice app.
Final product and Reflection
Reflection is hard for students to do after a project is complete. Reflection is one of the most important tools one can practice to improve future work. From looking at my video, I’m very happy with my first effort but it’s by no means perfect. Where could I improve?
The video is not level. I could not get my iPad to straighten parallel to my work surface. As a result, the off-kilter angle bothers me. I will need to come up with a better solution for my next attempt.
My lighting is a bit dark. I like the look of natural light; the dark shadows of artificial light bother me. When I chose to start filming, it was overcast outside, darkening my video.
The picture quality is a bit grainy. The video is slightly out of focus. My iPad is school district issued, three years old and well used; all quality issues I cannot change at the moment. So for now, I will have to deal.
I don’t like the start or end of my video. I should have added in clips of a blank chalkboard, allowing the music to play out a bit at either end.
Next Steps and New Learnings
I will reshoot the video tomorrow, using my reflections to improve the overall quality.
I’m also really interested in TikTok. I haven’t been able to get into SnapChat but I definitely see the draw of TikTok. I love a good lip sync and I have been practicing a library-related song to share with students soon.
What new learnings have come your way lately? I’d love to hear. Please comment below.