Today is Gallery Day and I can’t wait to share the wild work of our students with you all. I am happy to hear how many of you are enjoying “The Wild Robot” read aloud — and across all grades! Peter Brown has truly written a special story. We have “The Wild Robot Escapes” in our library learning commons too, an FYI. 😉
Here is a sneak peak of today’s awesome-sauceness:
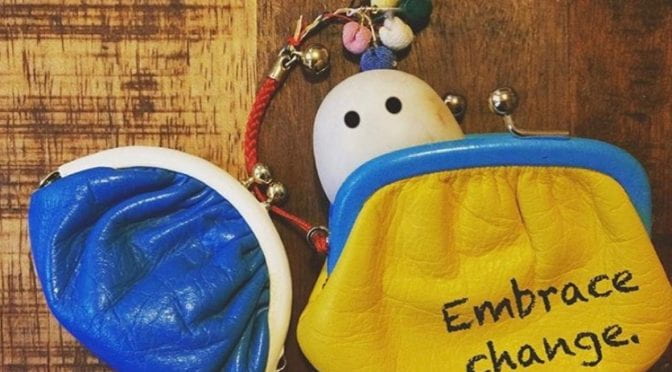
Our École Mount Prevost’s ESW students’ wild robots, found in the wild, Grades K – 5:
MH, Grade 1, Wild Robot diorama:
I will add all to the work to the Student Gallery page by 3 pm today. If your child has work they would like to submit, please know I will accept work at any time, there is no deadline. The only reason I post at 3 on Fridays is to have as much work as possible revealed at once. I will however, add student work anytime after.
Have you been listening to our daily read aloud, “The Wild Robot” by Peter Brown? If yes — you rock! If not, it’s never too late to start. You are missing out on a lovely and exciting story.
Roz is a shipwrecked robot on an island inhabited by foxes, bears, geese and all the other lovely animals we find in our Pacific west coast. Learning from the animals on the island, Roz tries to survive in the wilderness. Unfortunately, the animals are not too accepting of her.
Today, we are going to do a quick and easy directed-line drawing “warm-up” of Roz and the trees that surround her in the forest:
Draw Roz the Wild Robot from “The Wild Robot” here:
Next, we need to draw our plan or design for OUR wild robot! Daniel Salmieri, the illustrator of “Robo-Sauce” created his robot sketch when planning the story with author Adam Rubin:
From Daniel Salmieri
All good designs come from a sketch of the ideas in our heads:
From artist Mayu Kawakami, robot concept sketch
I’m pulling inspiration from insects. I’m really fascinated by Green Lacewings for a number of reasons:
Lacewings are beneficial insects for our gardens. They eat the bugs that could destroy the vegetables we are trying to grow.
Like bees, lacewings are pollinators. Without pollinators, we would have no flowering plants – that means no fruit people!
I love lace and the name “lacewing” gives me a delightful vision of an elegant beautiful creature with delicate and fragile wings made from bobbin lace or laser cut paper lace.
Lacewings are ferocious when it comes to devouring garden pests. How wonderful would it be to combine a delicate animal with the strong metal of a robot?
A green lacewing
Here’s my design sketch for my lacewing robot:
Mme Zibin’s Robot design concept
Remember:
A design sketch is just a starting point. As an artist, you always have the right to change your design as you build.
I can’t wait to see what you come up with! Tomorrow we build.
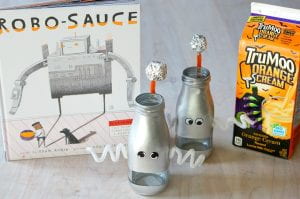
From the duo who brought you, “Dragon’s Love Tacos“, today’s story, “Robo-Sauce” is, well, awesome-sauce and the perfect ingredient to kick off Robot Week!
Tomorrow we design our robots for our robot builds on Thursday. When reading “Robo-Sauce” today, look at all of the interesting robots included in the story. See what type of robots give you ideas for your own robot design.
I sure enjoyed making the video and I’m happy to say I made our principal laugh when I showed him. Success! He thought the sound effects were funny too – robots make noises after all!
Find today’s reading of “Robo-Sauce” here:
Want to make your own Robo-Sauce? Check out the recipe here at Forks & Folly to make your own:
We have a special week coming up; today we will celebrate May 4th with a Star Wars read aloud and directed-line drawing lessons of some beloved Star Wars characters.
First, let’s get to our Star Wars story! Today I am reading the hilarious, “Are You Scared, Darth Vader?” by Adam Rex. Darth Vader has crashed in the middle of a deep dark wood on planet earth. We want to know if he’s okay, “are you scared, Darth Vader?” It takes a lot to scare this dark lord — or does it?
Find today’s story here:
Directed Line Drawings
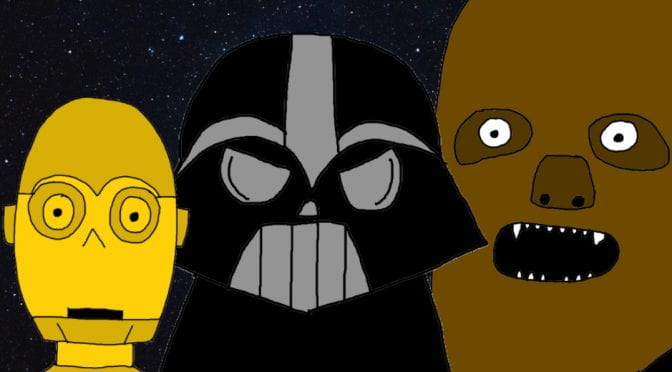
Next, continue the Star Wars celebration by joining Mme Zibin online for not one, not two, but three directed-line drawings of some beloved Star Wars characters. Thank you to www.thebookwrangler.com for the great drawing lesson.
First, who doesn’t enjoy a good droid joke?
Draw C-3P0 with Mme Zibin here:
A little wookie humour:
Draw Chewbacca with Mme Zibin here:
If your humour is a bit on the dark side:
Draw Darth Vader with Mme Zibin here:
I hope you enjoyed a little bit of Star Wars. I can’t wait to see your character drawings!
Today is Gallery Day on the blog and it’s gonna rock!
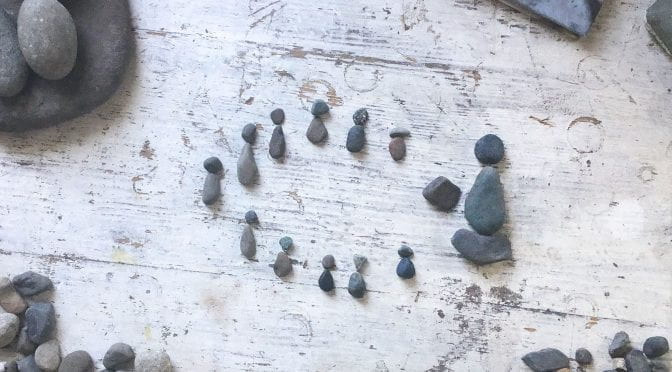
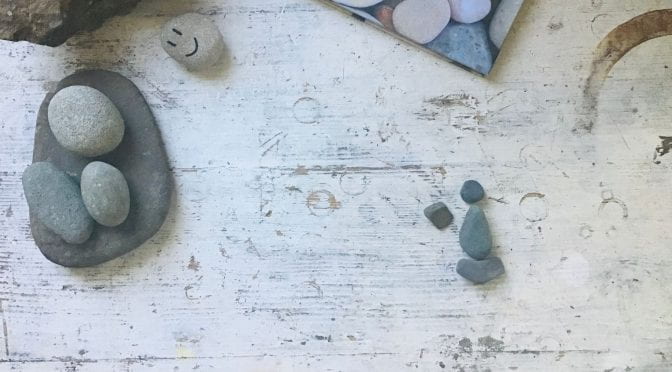
Gallery Day is my most favourite of days. You must check out the past weeks’ student work on the Student Gallery page. Here is just a sample of this week’s touching projects:
By Ecole Mt Prevost ESW students, Grades K – 3
Ishi by MH Grade 1
I will add all to the work to the Student Gallery page by 3 pm today. If your child has work they would like to submit, please know I will accept work at any time, there is no deadline. The only reason I post at 3 on Fridays is to have as much work as possible revealed at once. I will however, add student work anytime after.
Please see the “Submitting Student Work” Page for more information.
Un grand merci to all those taking part. I’m finding your work so inspiring.
I have really enjoyed exploring the stories of rocks this week. I’ve learned that rocks make me happy. There is something meditative about observing, sifting, sorting and arranging rocks.
Today we are going to build little scenes with the rocks we collected on our rock hunts. You do not need much for the activity:
Materials:
rocks
pebbles
work surface
Optional materials:
camera, phone or tablet to take a picture of your rock story
heavy paper or cardboard to glue your scene to
hot glue or craft glue
I don’t like to accumulate too much “stuff” so I arranged my scene and took a picture to share and for my memories. I will return the stones to their environment later today.
Here’s today’s How-To video:
I hope you enjoy today’s activity and find it as relaxing as I have.
Tomorrow is Gallery Day! I am so excited to share with you all the submissions I’ve already received. If you would like to share your work with others, please see the ” Submitting Student Work” tab at the top of the home page. I will accept your work at any time. I hope to post as much work as possible by noon tomorrow, but if you are late with your submission, send it to me anyway at dzibin@sd79.bc.ca.
I must say, I was blown away by the work you all submitted last week, your creativity blew me away. If you haven’t seen our Student Gallery, it’s a must see!
This week is going to rock! I’m sharing with you the story, “ISHI: Simple Tips From a Solid Friend” by Akiko Yabuki. From the publisher:
“An award-winning, shareable, cozy hug of a picture book featuring Ishi, an optimistic little rock who reminds readers to choose and share happiness! The ISHI book features a simple rock character which appeals to a wide audience, with valuable lessons in compassion for the self and for others. The FROM / TO page on the inside cover of this picture book encourages the readers to share the book and pass it on with kindness, which creates opportunities for the readers to experience the joy of giving.”
ISHI has a lot of feelings, just like us! Just as ISHI does, it’s good to recognize how you are feeling and begin to recognize why you may be feeling the way you do. What is a healthy action you can take to feel better? As an EMP parent said yesterday, in her family they ask, “What would ISHI do?”
Find today’s reading here:
Today, notice all your feelings. Notice your stuck feelings, your pressured feelings, your stinky feelings, your bottled up feelings. What do you do to feel better?
Wednesday we will make our own ISHI’s and illustrate our yucky feelings and our solutions in photos, just like ISHI. But first, we need to go on a rock hunt! Tune in tomorrow for a second read aloud before embarking on your hunt.
I love Gallery Day. Student work has been loaded on the Student Gallery Page; to see the mind-blowing creations visit the Student Gallery page. Here is just a sampling of the outstanding work from the past week:
I will add all to the work to the Student Gallery page by 3 pm today. If your child has work they would like to submit, please know I will accept work at any time, there is no deadline. The only reason I post at 3 on Fridays is to have as much work as possible revealed at once. I will however, add student work anytime after.
Please see the “Submitting Student Work” Page for more information.
Un grand merci to all those taking part. I love your work so much!
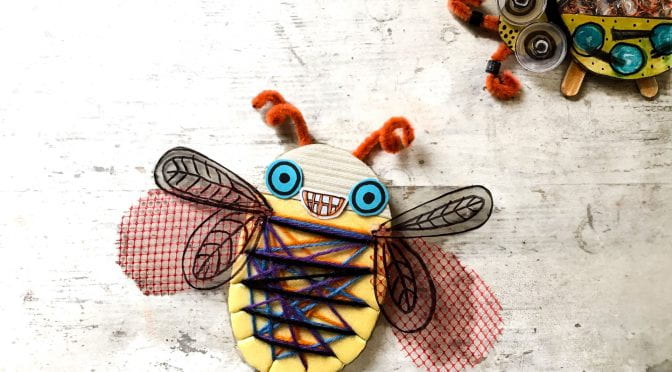
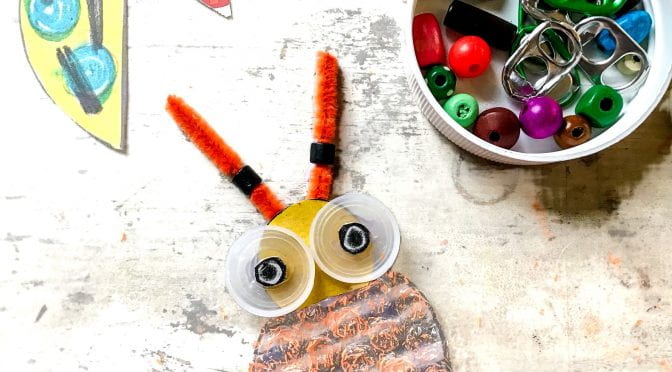
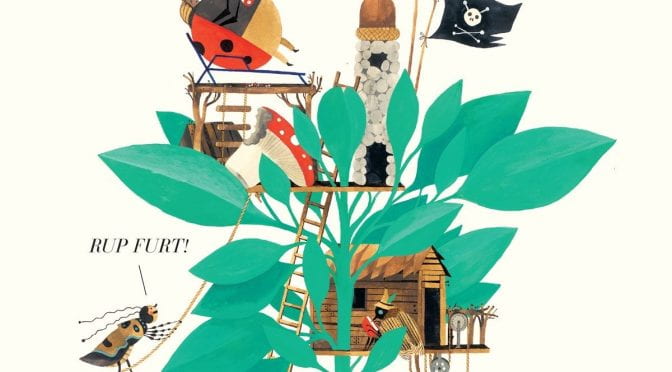
Today we are going to craft and insect or a bug from recycled materials. It might be a good idea to listen to “Du Iz Tak” again and observe the bugs: their shapes, their colours and markings.
An image of insects by author and illustrator Carson Ellis
I received some wonderful photos of bug forts from students yesterday – your creativity is outstanding! I smiled all day long yesterday because of what you created.
It’s time to raid your recycling bin again!
You will need a sturdier base for the body – the cardboard from cereal boxes or the bottom of a clean foam tray. Both are easy to cut with scissors too. The rest of the materials listed below are completely optional. Feel free to use what you can find around the house.
Recyclables and a few craft supplies thrown in!
Materials:
cereal, cracker or granola bar boxes OR
styrofoam trays
string, yarn, ribbon
plastic bottle lids, metal pull tabs and other small recycled bits
clear plastic from produce or packaging boxes (optional)
beads (optional)
pipe cleaners (optional)
scissors
pencil or marker
glue or tape
crayons, markers or pencil crayons
plain recycled paper and/or patterned paper
Remember: I’m only here to inspire you with a project. Feel free to use any recycled materials you would like to for the activity. One of the greatest things about the practice of making is the problem solving involved. If you don’t have one material you need for a step, what do you have on hand to use in it’s place?
Step-By-Step Instructions
I made two eBooks with the step-by-step instructions on how to make two different style bugs:
Tomorrow is Gallery Day! I am so excited to share with you all the submissions I’ve already received. If you would like to share your work with others, please see the ” Submitting Student Work” tab at the top of the home page. I will accept your work at any time. I hope to post as much work as possible by noon tomorrow, but if you are late with your submission, send it to me anyway at dzibin@sd79.bc.ca.
Today is the day we make our forts! It’s raining today — so fort making indoors, while listening to an audio book maybe, sounds lovely.
First, you will need to sketch a design for your fort:
All good builds start with a design idea.
If you are having trouble coming up with ideas, simply google “Toy tree forts” or “Fairy tree forts” under images and a ton of ideas will turn up to inspire you!
Now if all you wanted to do was draw a fort and stop there, that’s wonderful!
If you would like to continue, go to your recycling box and see what supplies you have in there to help build the base of your fort:
Mme Zibin’s recyclables
If you wanted to make your fort only from the supplies you collected in the forest, that’s fine too!
Mme Zibin’s forest supplies.
If you would like to mix your forest supplies with your recyclables, you have two options:
Just like blocks, you can build and balance all your forest supplies to build a fort, with out using any glue or tape. In fact, a wonderful challenge would be to build a fort using no adhesives at all. Use only string and balancing.
Or you could use the following materials to put your fort together:
Materials to put your fort together.
Pictured are the many different ways you could attach items together. You could also use wire or twist ties or with a parent use hammer and nails — the list is endless! It’s up to you and your family.
A tip for starting your build with recyclables:
I love paper towel and toilet paper rolls. I also adore cardboard. Using a special paper technique, you can build a sturdy base for your fort:
How to cut a flange
and then using glue or tape, attach your flange to your cardboard base:
Flange and base.
Now add all your materials together!
I decided to make fort platforms by hot gluing twigs to a cardboard base:
Fort platform.
I can’t wait to work on my fort today! I will share my fort with you all on Gallery Day this Friday.
Remember, you can use ANY materials you want to build a fort:
Other ways of making forts.
Being creative and making is the only goal!
I made an ebook for you all to read on fort making. Find it here: